In case you’re wondering, a vague nerdy interest in the scientific side of things (informed, unfortunately, by nothing beyond high school classes!)  is a large part of what’s keeping me motivated on this Elimination Diet.  It’s been over a month now of keeping a strict food diary, and there have been some results.  But culinarily and socially, our family’s eating has been less than exciting.  I did enjoy doing a couple of the food challenges: the first week, I got to reintroduce salicylates, which, among other things, meant I could have herbs and spices again.  As you would imagine, I went crazy – making cajun this and pilaf that – and when I then rang my dietician to ask about some strange things my body was doing, she said: you sound toxic; you must stop.  Oh dear.  The second challenge was better: for amines, I had to eat chocolate every day!  Needless to say, that was fun, and happily my body did not protest (as much).

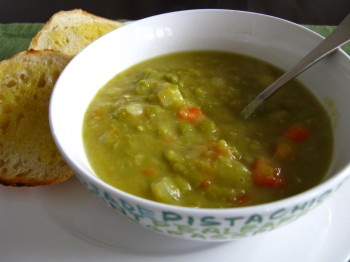
But what I’ve been trying to do is to refine some core recipes that comply with the requirements of the bare-bones elimination diet that I can use when I feel the need to detox again.  I returned to an adaptation of a Moosewood favourite that we first tried in the autumn.  It’s hard to make pea soup look appealing, but it sure is tasty and nourishing, and uses very few ingredients.  I just made a up a huge lot that will keep me going in lunches all week.

Meanwhile, wish me luck as I try out glutamates (MSG being one of the better known incarnations of this chemical). I’m hoping that I don’t react because I so want to continue to be able to eat mushrooms and parmesan cheese (which contain naturally-occurring glutamates), not to mention eating Chinese food again!  So have a go with some pea soup for now and cross your fingers for me!
IMG_3884_1

Split pea and vegetable soup
Adapted from Moosewood Cookbook Classics

1 tbsp butter
1 large leek, white part only, finely sliced
2 large garlic cloves, roughly chopped
3 carrots, cut into 1.5cm chunks
2 medium potatoes, peeled and cut into 1.5cm chunks
2 cups dry split peas
about 1.25L  water

Heat the butter in a large saucepan.  When the butter has melted, add in the leek, carrot and potato.  Saute on low-medium heat to sweat the vegetables.  It should take about 10-12 minutes until they are aromatic and the leek is completely soft but not coloured.  Add in the garlic and saute for 1 or 2 minutes more.

Then add in all the split peas and the water.  Bring to the boil, then simmer gently for about an hour, stirring occasionally to help the peas break down.  You might need to add more water as needed.  Season to taste.

Yield:  serves 6

As I approach the official end of the elimination phase of my dietary investigations, I’ve been pleasantly surprised to notice that this time has featured a rediscovery of some of my childhood foods.  Many of these reflect that I didn’t grow up with a vegetable focussed diet, but I have to admit that I’ve enjoyed returning to rice congee (made with real chicken stock), shredded chicken and carrot soup with glass noodles, and a chicken, macaroni and vegetable soup.  These were part of my Mum’s repertoire of simple, nourishing Indonesian-Chinese staples that our family grew up with.  Since very few asian flavours are permitted by my restricted diet (ie no soy, ginger, miso, chilli etc), I’ve enjoyed these nostalgic meals even more.

But I have tried to keep faith where possible with our present family’s vege-centred food.  This has met with varied success.  A few dishes I reported on in the last post have had several good re-runs, but notable dissapointments included my trial of diet-friendly mayonnaise (an alchemical test as olive oil and lemon juice are not permitted)  and pear chutney (featuring tinned pears and citric acid!).  I had a breakthrough though when I realised that since fresh cheese is permitted, I could therefore eat goats cheese!  Hooray!  Here’s what worked in the past two weeks:

IMG_4166_1– roasted beetroot and goats cheese frittata
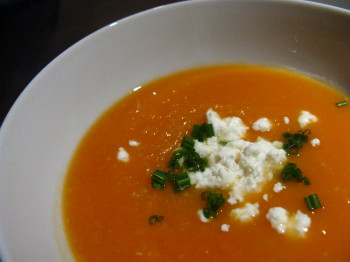
– roasted sweet potato and red lentil soup, with goats cheese and chives
– apple sponge pudding (pictured, based on Johanna’s recipe)
– tapioca pudding (from 101 cookbooks)

I was really happy with the sweet potato soup, especially the gorgeous orange colour that the soup retains because the sweet potatoes are roasted whole in their skins.  That way, only the skins darken and the flesh stays bright and pure. (Also, if you don’t have time to roast the sweet potatoes, I think you could get a pretty good result by just chopping up the uncooked potatotes and adding them with the stock. )  So: hooray for goats cheese, which has been the flavour saviour of the past week!

IMG_4164_1

Roasted sweet potato and red lentil soup with goats cheese

1.5kg sweet potatoes (about 3 medium)
1 leek, finely sliced
1 large clove garlic, finely sliced
1 tbsp butter
1/2 cup red lentils
1.5 L stock (I used chicken stock, but for a vege version use chicken-style powder)
50g fresh goats cheese
chives, snipped

Preheat the oven to 200C.  Line a baking tray with baking paper (this is essential as lots of very sticky juice oozes out during baking!), and place whole unpeeled sweet potatoes on it.  Bake for about an hour, until the potatoes feel soft when you poke a fork into them.  Cut in half with a knife and allow to cool slightly.

In a large soup pot, saute the leek and garlic on low heat until softened but not coloured (about 8 minutes).  Scoop out the sweet potato flesh and add to the pot, and pour in the stock.  Bring to the boil.  Take off the heat and puree with a hand blender.  Return to the heat, add in the lentils and simmer for about 20 minutes until the lentils have broken down.  You might need to add more liquid at this stage, according to the consistency you are after.  Season well.

Serve into bowls, with the goats cheese and chives on top.

Serves: 4-6 as a main.

So I have finally decided to do something about my irksome suspicions that some unpleasant allergy-like reactions I’ve been having may be, sadly, related to food.  I took myself to see a dietician who is helping me to investigate just what the culprits might be.  Unfortunately, there appears to be no getting around the fact that the only way to do this properly is to start with an elimination diet (skin prick tests and the like are not sensitive enough to indicate food intolerances).

The version of the diet I’m doing is not super strict, as it allows me to eat foods that have a low-to-moderate amount of the relevant food-chemicals that we’re testing (salicylates, amines and glutamates, if you’re asking).  However, it does cut a huge swathe in the variety of foods that I’m used to eating and cooking with.    For example: onion, corn, zucchini, capsicum, tomato, cauliflower, broccoli, eggplant, spinach and tomato are out!  (My dietician had to laugh when at this point of the session I confessed that our household eats mostly vegetarian!)  Also out are most fruits (except pear and banana), cheeses (except fresh ones like ricotta or cottage cheese), and, most tragically, chocolate.  Lucky this diet thing is just for three weeks, voluntary and for a good cause!

So I decided to approach the whole thing as a new culinary challenge: and with some useful tips from friends, and a new cookbook under wing, I set about making a detailed food plan for Week 1 and its accompanying shopping list.  I’m happy to say that, almost at the that week, it hasn’t been all so bad.  Apart from chocolate, I mostly miss eating mandarines and my regular night-time peppermint tea, and I miss cooking with lemon, pepper, and tasty cheeses like parmesan.  Here’s a wrap-up of the week’s vegetarian/pescetarian highlights (I’ll skip our non-vegetarian lapses):

– caramelised tofu with crispy brussels sprouts (from 101 cookbooks)
– sweet potato tortilla with caramelised leeks and asparagus
– homemade crunchy fish with garlic mash (homemade fresh breadcrumbs are the way to go here)
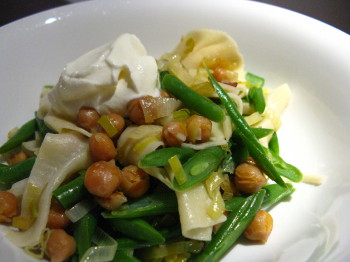
– panfried chickpeas with green beans and pasta ribbons
– and a giant batch of maple rhubarb for dessert.

I was pleasantly surprised by how the chickpeas turned out, and I think I might even make them again post-diet.  It’s a snap to make and uses few ingredients.  The chickpeas turn out to be incredibly tasty and a little bit crunchy, which provides a great foil for the silky pasta ribbons.  See what you think!

IMG_4108

Pan-fried chickpeas with green beans and pasta ribbons
Adapted from 101 cookbooks’ chickpea salad

2 tbsp butter
1 leek, trimmed and sliced thinly into half-moons
1 400g tin chickpeas, drained
1 large clove garlic, sliced
large handful green beans, sliced on the diagonal
2 large fresh lasagna sheets, cut into thick ribbons
greek yoghurt, to serve

In a frying pan, melt the butter and toss in the leek and chickpeas.  Cook over medium-high heat until the leek starts to soften.  Add the garlic, and cook until the leek and chickpeas take on some colour (may take 10-15 minutes all up).

While this is happening, put on a separate saucepan of water to boil for the pasta.  Cook the pasta ribbons according to the packet (mine took only a few minutes to cook), and 2 minutes before they are done, toss in the beans.  When the beans are bright green, drain the pasta and beans.

When both the chickpea mixture and the pasta are done, tip the pasta and beans into the frying pan. Toss gently over low heat to incorporate it all together, and season with salt.  Serve up in bowls with a generous dollop of yoghurt on top.

Post-diet variations: some lemon zest added to the chickpea mixture at the end could be good; also I’d like to try some parmesan with this to serve as well.

Yield: serves 2 as a main

A search for internet inspiration for kid-friendly cookies – sweet but not overly so, easy to make and fun to look at – let me yet again to Heidi’s great site with her recipe for Animal Cracker Cookies.  While this is a really straightforward recipe in which you essentially stir the wet into the dry, the resulting dough for me was a little crumbly and hard to hold together.  It was only after its resting time in the fridge that it was able to yield to the pressure of the rolling pin (albeit rolled between sheets of baking paper).  From that point, cutting out the shapes and transferring them to the baking tray was easy (I rolled out the dough to about 3mm thin), the cookies take just a few minutes to bake, and look super cute with rainbow sugar sprinkled on top!

IMG_4085

Have a look at Heidi’s site for the recipe (here), which I can thoroughly recommend.  I used regular plain flour instead of the wholewheat pastry flour, and simply used the dessicated coconut I had on hand (this didn’t need further chopping).   You could use demerara sugar (our Australian substitute for the American turbinado) in place of rainbow sugar.  The coconut flavour is not too strong here: it works well as a lovely background flavour to a simple, plain cookie with a great snappy bite.

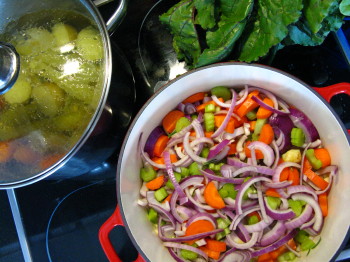
Is it silly to think that making this soup for a recent big weekend cook-up was somehow even more homely and wholesome because it was done in my shiny new red pot?  Seeing all the colourful vegies in there, with the unruly tops of my market-day beetroot also sneaking into the frame, was just the thing to inspire industrious home-making thoughts. Soup, with homemade stock, was the order of the day.

IMG_4049_1

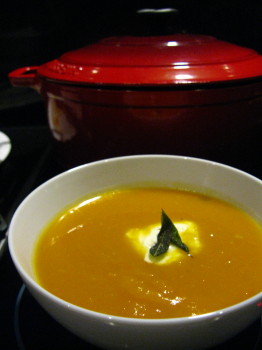
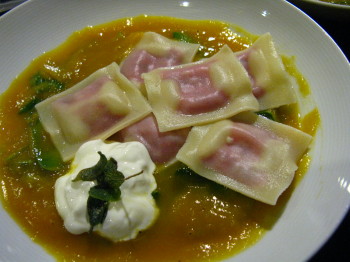
We have fond memories of a knockout pumpkin soup we enjoyed at the London Fifteen restaurant a few years back.  Among all the dishes that we sampled that day, we agreed that the soup starter had stolen the show.  This version, which follows the recipe in Jamie’s Dinners with only minor changes, was a more straightforward affair but still tasty and satisfying. And, seeing as it made a vatful in quantity, the leftovers gave us the opportunity to take the soup in a different direction with the addition of some greens and unusual ravioli.   I’m sending over our second variation on this soup over to Jacqueline for this month’s No Croutons Required, which asks for ideas for soups or salads featuring leaves.  Even though pumpkin soup is usually pretty uniformly smooth in texture, the idea of using the soup as a background to other flavours and textures appealed to me.   I spied some stunning beetroot ravioli at the greengrocer that I wanted to try but which I thought might not work with our usual pasta sauces.  So in that went; plus, stirring some baby greens into the soup is a great way of sneaking in some extra veg and is a snap to do.  Who says that orange, pink and green can’t look good together?

IMG_4053_1Take 1: Simple pumpkin soup with sage
Adapted from Jamie’s Dinners

olive oil
handful fresh sage leaves
2 red onions, sliced into thick half moons
2 sticks celery, trimmed and chopped
2 carrots, peeled and chopped
4 cloves garlic, peeled and chopped
2 sprigs rosemary, leaves picked
2kg butternut pumpkin (squash), cut into rough chunks
2L vegetable stock
creme fraiche or sour cream, for dolloping

In a very large saucepan, heat some olive oil until hot and drop in the sage leaves.  When they have sizzled and crisped up, take them out to drain on some paper towel.  Set aside the leaves until you are ready to eat.

Into the remaining hot oil, tip in the onion, celery, carrot, garlic and rosemary, and saute on low heat for about 10-15 minutes until the onion has softened.   Then add the pumpkin and stock, bring to the boil and simmer for about half an hour or until all the vegetables are soft.

Take off the heat and puree the soup with a hand blender.  Season well with salt and pepper.

To serve, add a generous dollop of creme fraiche and top with some crispy sage leaves.

Yield: 8 servings

IMG_4069_1

Take 2: Pumpkin soup with beetroot ravioli and baby spinach

Seeing as this is more an idea than a recipe, my tips on this one are a little freeform…

– heat some pumpkin soup
– find some stunning filled fresh pasta (eg beetroot ravioli!) and cook according to instructions
– at the bottom of each soup bowl, place a generous handful of baby spinach
– ladle over the hot soup, and stir gently to wilt the leaves
– top with a few ravioli, and, of course, some creme fraiche and sage leaves.

I remember the first time I made chocolate self-saucing pudding was as a child of around 11 or 12.  Even from the perspective of a kid who had never made much pudding before, that this recipe would turn into a pudding with sauce seemed just highly improbable.  I’d be grateful for any information out there about how – scientifically, I guess – this recipe works: from some pantry and fridge basics you make a melt-and-mix cake batter, then sprinkle over some sugar and cocoa, and then pour over some boiling water.  It is the last part that seems weird.  But this recipe is dead easy and yet wonderfully comforting and satisfying.  We thought that we grown-ups needed a bit of extra indulgence this time around so added some Pedro Ximinez-soaked prunes as well – we can definitely recommend it.  We ate it as is on the first night, with leftovers enjoyed throughout the week warmed with an extra splash of pedro on top and a blob of custard.

NCRmay09And if you may be starting to think that our house seems to have been a house of desserts of late, you are right.  On that note I would like to say my warm thanks for supporting my entry (a warming dish of winter berries) to May’s No Crouton’s Required event.  I’m chuffed to now sport the winner’s badge for the month!  It’s lovely to receive this encouragement from readers, and I’m particularly grateful to the event organisers Lisa and Jacqueline, who apart from organising the event also maintain inspiring food blogs themselves.
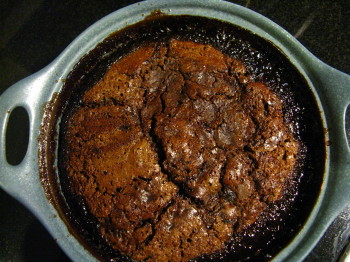
I promise that we have been eating our greens at dinner, but today we’re still talking about icky and sticky desserts, so here’s the pudding recipe.  Enjoy!

IMG_4036_1
Chocolate self-saucing pudding with drunken prunes
Adapted from Stephanie Alexander

125g plain flour
pinch of salt
1/4 castor sugar
2 tsp baking powder
2 tbsp cocoa powder
1/2 cup milk
40g unsalted butter, melted
1 egg
dash vanilla essence
1/3 cup prunes, sliced roughly
3 tbsp Pedro Ximinez sherry (or brandy or cognac or whatever you have handy)

For the topping
180g brown sugar
2tbsp cocoa powder
1 cup boiling water

Preheat oven to 180C.

Soak the prunes in the sherry and set aside.

Mix the flour, salt, sugar, baking powder and cocoa in a large bowl.  In a jug mix the melted butter, milk, egg and vanilla.  Tip the wet into the dry and mix thoroughly.  Stir through the prune mixture with the juices.  Tip into a 1.4L baking dish.

For the topping, mix together the brown sugar and the cocoa in a small bowl.  Scatter over the pudding batter.  Then carefully pour over the boiling water.

Bake for 40-45 minutes.  Serve hot with custard and extra sherry.

Yield: 6-8 servings.

A craving for dessert that came too late for a mercy dash to the shop instead led us to this hastily-put-together invention.  It’s not really a recipe: just take some odd bits of shortcrust pastry, one ripe pear, and some ends of glace ginger, and voila: dessert.    The pear and ginger filling was a nice riff on the familiar apple turnover idea, suitably spicy and warming for our present chilly season.  And if you’ll believe me,  the heart-shapes you see below were almost purely fortuitous.  My pastry odd-bits were vaguely triangular to start with, and got me wondering whether my heart-shaped mould would fit over the filling, which they miraculously did.  See where your odds and ends take you, seemed to be the message of the night.  Indeed!

IMG_4033_1

Pear and Ginger Hearts

Shortcrust pastry (enough for 2 parcels of whatever shape you desire)
1 large ripe pear, peeled and diced
4-5 ends glace ginger, finely chopped (about 1 heaped tbsp in all)
1 tsp raw caster sugar and a big pinch of cinnamon, for sprinkling on top
1 egg, lightly beaten

Preheat pastry to 200C.

Divide your pastry into 4 pieces.  You will need 2 smaller ones for bases, and 2 larger ones for the tops.

In a small bowl, stir together the pear pieces and ginger.  Divide the pear mix onto your 2 bases, leaving a 1cm edge.  Brush the edge with the egg mixture.  Place your pastry tops over the pear, and push down to seal.  Cut out the pastry parcels into hearts or whatever shapes fit best.  Brush the tops really well with the egg mixture, and sprinkle over the sugar and cinnamon mixture.

Bake for 12 minutes, then turn down the heat to 180C and bake for a further 15 minutes or until the tops are golden.

Yield: 2 hearts.

I don’t usually have the budget or the time to look over all the lovely foodie books and magazines I would like to, so I really enjoyed having the chance to leaf through a whole stack of glossy food magazines while travelling a few months ago – for me, definitely one of the perks of not-so-frequent air travel!

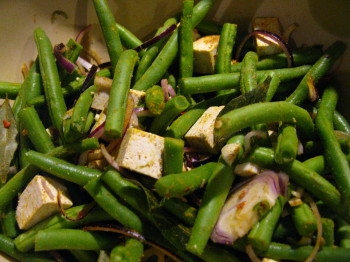
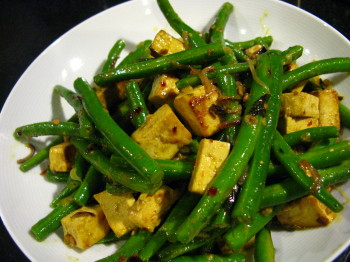
This recipe caught my eye as it featured Indian flavours (a cuisine I’m trying to learn more about, and trying to cook from spices rather than bought bases), vegetarian, quick to cook (curry in spirit but cooks with the speed of a stir-fry), and used items that were all currently ready to spring to action in my kitchen (eg the usually forlorn fenugreek).  Hooray!  On the night I ended up cooking it, my fridge/pantry line-up was a bit different from what the original recipe called for – hence the inauthentic addition of tofu – but gosh can I recommend this for a speedy and tasty weeknight meal.  Even in the mixing bowl I was excited by the colours and freshness of the ingredients:

IMG_3985_1

One note of warning: the chilli flavours here aren’t too hot, but add a lovely rounded warmth and is aa key part of the dish in my view.  Best not for a family meal with kiddies (unless yours are braver than mine is).

IMG_3991_1

Quick and perky green bean curry
Adapted from Australian Gourmet Traveller

400g green beans, topped and tailed
150g firm tofu, cubed
1 small red onion, sliced into half moons
10 curry leaves
2 small green chilli, seeded and finely chopped
1 tsp each chilli flakes and ground cumin
1/2 tsp each fenugreek seeds and fennel seeds
1/4 tsp turmeric
1 tbsp vegetable oil
1/2 coconut milk

In a large bowl, mix together all the ingredients except for the oil and coconut milk.

Heat the oil in a wok, and then tip in the green bean mixture.  Cook for about 5 minutes on high until the onion has softened and the beans look bright green.

Tip in the coconut milk, and continue to stir-fry on high until most of the milk has evaporated and the bean mixture is almost glazed with it.  Season with some salt to taste, and serve with rice.

Yield: 2-3 serves.  I would definitely double this next time, as leftovers the next day were still yummy.

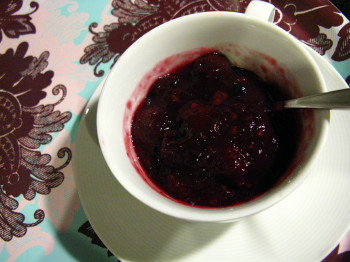
Even after wondering whether I might have picked up some colour on my nose from the glorious sunshine we’re getting here, the nights and mornings tell me that winter’s well on the way.  So somehow it seems perfectly sensible to return to an old favourite from the northern hemisphere – rote grütze – a cherry and berry wonder from Germany.

Literally translating as ‘red groats’, it seems that traditionally this recipe was made with a combination of red fruit juices and grains.  The modern version I’m tapping into here is still based on red fruit juice (here I’ve used grape juice), but also uses whole red fruits.  It’s not super sweet, and enriched with a dash of red wine,  it’s a dessert that recalls the best of a steaming mug of glühwein, hearty and cosy-making from the insides.  It’s a fantastic served warm with vanilla custard.  It also keeps well in the fridge and Germans have been known to have it cold on their cereal of a morning.  Give it a go – but let me warn you that the grütze of course loses its soupy-stewy consistency to become more jelly-like in the cold, so don’t be disturbed at the transformation!

And while it does not sit perfectly within a particular genre, having some characteristics of a compote, a stew (like stewed apple or rhubarb), a jelly, a pudding – I’m crossing my fingers that this rote grütze is soup-like enough to qualify for this month’s No Croutons Required event, in which Lisa is calling for soups or salads with berries.

IMG_3980

Rote grütze (red groats)

415g tin cherries, drained and juice reserved
about 450ml dark red grape juice (unsweetened)
1/3 cup sugar
1 1/2 teaspoons lemon zest
2 tablespoons lemon juice
1/3 cup cornflour
1/2 red wine
2-3 cups mixed red berries (frozen is fine)

Put the reserved cherry juice in a measuring jug and make up to 600ml with the red grape juice.  Tip into a medium saucepan, and then add 1 more cup grape juice.  Add in the sugar, lemon zest and juice.  Bring to the boil.

In a separate glass, stir together the cornflour and the red wine.  When the juice mixture is just boiling, pour the cornflour mixture into the saucepan.  Return to the boil, stirring continuously as the sauce thickens, and simmer for 3 minutes.

Stir in the drained cherries and the berries and gently return to the boil.  Take off the heat and allow to cool slightly before serving.

Yield: about 1.5L, which would be a good 6-8 servings.  Keep in the fridge and microwave or heat gently on the stove to serve.

While I take a lot of inspiration from Jamie Oliver’s enthusiasm for all things natural, cooking and keeping it real on the whole, I must say even he can’t inspire me to get fresh peas in a pod and pod them.  I simply don’t have the kind of day where podding peas gets any time priority right now.  In his original recipe for this, he calls for fresh peas and broad beans, which apparently have far superior flavour.  So if any of you want to try with the fresh stuff – let me know how you go.

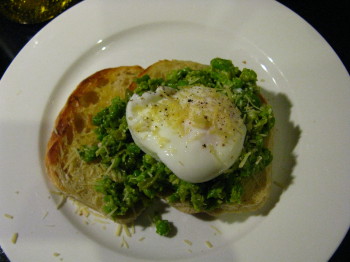
But the idea of tasty peas, smushed on garlic toast, and topped with a poached egg?  That’s a winner in my book, as it can really serve at any time of the day for a healthy dose of greens, protein and flavour.  Warning for all those against peas – mushy or otherwise – this recipe is built on them.  I, as a pea lover, am happy to find another way to work them into my meals.

[And as you can see from the looming shadows in this less than stellar photo, we had this as a quick weeknight dinner; I imagine it would make a lovely bright brekky, and look much more radiant in a photo taken then too.]

IMG_3894_1

Smashed peas on toast
Adapted from a Jamie Oliver recipe

We had these with a poached egg on top, but you could also go with the original recipe’s suggestion of plopping a torn-up ball of buffalo mozzarella over the peas.

1 1/2 cups frozen peas, thawed to room temperature
about 12 leaves fresh mint
1/2 cup grated parmesan, plus extra to top
juice of 1 lemon
4 slices sourdough, toasted
olive oil
1 clove of garlic, halved
poached eggs (see note above)

To make the smashed peas, put the peas and mint in a mortar and pestle and smash until you have a rough paste.  (It is fine to do this in stages if they don’t all fit at once.)

Stir in enough olive oil to make the paste barely spreadable (about 2 tablespoons should do it), then stir in the cheese.

Stir in about half of the lemon juice, then taste, adding salt and pepper as needed.  Add more lemon juice to taste if needed as well.  The idea is not to smash the peas so much that you have a puree consistency, but something short of that.  I liked my smashed peas to still have some identifiable pieces of peas and cheese in it.

(Get your eggs going at this point if you are having them.)  Toast the sourdough slices.  When done, drizzle with some olive oil and rub with the cut side of a garlic half.

Pile some peas on the garlic toast, top with an egg (or mozzarella), and scatter with some extra parmesan.

Yield: enough smashed peas for 2-3 serves.